Fixing woodwind cracks with carbon fiber banding

A relatively new way to fix cracks in woodwind bodies is carbon fiber banding.

carbon fiber

carbon fiber

The first step is to cut a channel for the fiber to lay in. I did this on the lathe.


channel

channel

Then we lay some epoxy in the cut and wrap the carbon fibers around, making sure we get them covered in lots of epoxy.


crack3

I cut off the excess fiber and let the joint sit overnight. Once it is nice and hard, I sand the excess glue and fiber down until it is even with the body. A little bit of light sanding with micro-mesh afterwards and the band is hardly noticeable. Unfortunately, I don’t have a picture of the finished product as a metal ring went over the banding so you wouldn’t be able to see it anyway.

Trip to the Burkart Flute factory


Image

Sorry for the bad quality, this was taken during my pre-iPhone days


I went to the Burkart Flute factory just outside of Boston a few years for a repair clinic and while the clinic itself wasn’t all that interesting, the tour of the factory defiantly was worth the trip. Burkart makes top of the line flutes with their lowest priced model starting at around $10K and their highest listed flute being close to $50K. They actually have and even more pricey model but it’s by request only. I don’t know anyone who’d spend $50,000 on a flute, but I asked one of the craftspeople how many flutes they actually sell and she told me they were backlogged a year at that point if I remember correctly.

Much of the price point is accounted for by the cost of raw materials; silver, gold, and platinum don’t exactly compare with the price of brass. Burkart had a safe full of gold and they let me hold a big piece of round silver stock that must have been about 3 pounds. Probably the most expensive thing I’ve ever had my hands on! In addition to the materials, the machines they use are very expensive as well. They had a few CNC lathes that run around half a million each as well as computerized milling machine which was very cool.

They also showed us some instrument bodies and parts they were manufacturing for other instrument makers. The owner wouldn’t tell us who they were doing work for but they had a bunch of french horn rotor assemblies as well as Oboe bodies they were making with the computerized milling machine I mentioned. That thing was amazing; once it had been programed (which was a lengthy process), it could churn out a flawless Oboe body in something like 5 minutes. The measurements were so exact that when we tested putting a rod screw through the posts, the alignment was absolutely perfect; you could drop the rod right through and it wouldn’t catch or wobble one bit.

Burkart also makes piccolos from grenadilla wood which they let season for two years before using. They told us that a big reason so many clarinets crack these days compared to times past is because the manufacturers are not waiting nearly enough time and letting the wood season properly. Apparently this is due to the shrinking numbers of the African Blackwood trees available as an increase in demand. It may be that sometime in the near future, there will be no more grenadilla instruments because of over-harvesting.

Finally, we got to see how their flutes are actually made. As you can see in the above picture, the manufacturing floor isn’t very fancy; just a big room with lots of benches and soldering torches. All the flutes made there have soldered on tone holes if memory serves and most of the parts are made from precious metals. I think it would be nerve-wracking to be soldering onto solid silver and gold body tubes all day; too much heat and you melt the thing. They told me it happened sometimes but it really wasn’t a big deal because they can just melt it down and remake it, a luxury afforded in manufacture that we defiantly do not have in the repair shop. All of the parts they use are made on site apart from pads and some screws from what I gathered. They had mini-arc welders that they used to tack the parts together before they did the silver soldering. I got to try the machine and it was very cool but I wasn’t very good at it. Oh well.

We were allowed to sort of wander around the factory floor much of the day and talk to the different people working. All of the workers do most of the different parts of the flute manufacture and rotate every so often. That seems like a good idea so people don’t get bored and when someone is out, someone else can take over a certain job if need arises. I got a chance to get my grubby fingers on some of the flute models in the show room, actually, holding those flutes might have been the most expensive things I’ve held as opposed to the silver rod, I’m not sure. Anyway, those flutes are just extraordinary: I can’t comment on the tone, I don’t play flute well enough to know, but the construction is of the absolute highest quality. Burkart uses a system called micro-Link to connect the keys to each other which is a system where there are no pins as there would be on most flutes. Visit their website to read about it because they can explain it better than I can, but generally I think the idea is to get a very tight feel with as little spring tension as possible. An added benefit would be that unlike on pinned key work, there are no pins to wear and eventually cause wobbly keys. That’s a guess on my part though so don’t quote me.

So it was a cool trip other than the fact that my junky car broke down on the way there, but that’s another boring story which I’ll spare you.

http://www.burkart.com/


Hall of shame


badpost

Poor poor saxophone, what have they done to you?!

So here’s a Yamaha 52 Bari sax that came in from a school who had previously had work done by Music and Arts. Apparently they needed to replace a post. It looks like they just took a post off a silver horn and soldered it onto the sax without bothering to fit it whatsoever to the key or rod. This is why you don’t get repairs done by people who don’t know or don’t care about what they’re doing. A word of advice: If you need work done on your horn and you care about quality repairs, please stay away from stores that do school rentals. Now this isn’t always absolutely the case; there are some stores that rent instruments that actually have good repair departments, but generally, you’re going to run into a bunch of hacks if you go to a store that derives the majority of it’s profit from rentals. There’s nothing wrong with rental shops if you want to rent an instrument, but if you want quality repairs, go to a dedicated repair shop. Look at the picture and don’t say I didn’t warn you.

Replacing a Broken Clarinet Tenon

The other day I replaced the bell tenon on a clarinet. First I used the lathe to cut off the old tenon so it was flush with the clarinet body. Then I used a cutter to bore the right size and depth hole into the body to fit the replacement tenon. Finally, I glued the new tenon in with epoxy.   This was a replacement tenon sold by Votaw Tool. You could manufacture a tenon yourself from plastic stock but its much easier to just buy one if you can.

photoimage (2)

This is a plastic clarinet, on a wood clarinet it would be more difficult to repair a broken tenon. Not impossible, but would be much more time consuming.

www.davidfrostmusic.com

yamaha custom z

hook

Here’s the neck strap ring on a Yamaha Custom Z alto sax that I was working on today. Notice that it’s made of stainless steel and not brass like on most other horns. If you have a quality neck strap with a stainless steel hook, after a lot of use, the stainless steel hook will eventually wear through the brass ring on the horn and you’ll have to have the ring replaced or risk dropping your horn. Yamaha was smart and added this nice little feature so you won’t have that problem. I wish more companies would put this much thought into their designs.

Manufacturers failures continued

bustedsax

Pictured above is an all too common sight on modern horns: Brown discoloration beneath the lacquer that shows up after a while. I see this on low quality horns as well as the name brand pro level horns. My own Bach Stradivarius trumpet had this issue around the bell wire. This is what happens when you speed up production and don’t properly prep a horn before lacquering. Soldering flux is very acidic and if you don’t completely wash it off and neutralize it after soldering, you get discoloration of the metal and the finish. This can happen with repairs and it happens at the factory when the instrument is built. In this case, after the neck was soldered together with the neck tenon it wasn’t properly cleaned and they lacquered over the metal while there was still soldering acid on the joint. At first, the horn looked fine but after a while the acid reacted with the lacquer and produced this gross brown stuff. You can see how it’s spread out from the joint where the acid was concentrated at. This is easily preventable with proper cleaning and neutralization of the part before it is lacquered. Unfortunately, you can’t repair this issue without removing the original lacquer from the area and re-lacquering it, which in most cases isn’t worth doing. So you’re stuck with this ugly mess.

Quality of instruments getting worse and worse

OLYMPUS DIGITAL CAMERA

There’s a disturbing trend in musical instrument manufacture: Companies are producing lower quality instruments with a higher price tag.

I’ve worked on thousands of instruments. As I’ve repaired, cleaned, and tested, and sold these horns, I’ve gotten to see all sorts of levels of quality in their manufacture. I’ve worked on $89.99 purple clarinets made in Chinese sweat shops to $10k bass saxophones made in the 1920s. Anyone who’s done a decent amount of repair work can tell you there’s a wide spectrum of quality in instruments. It’s from getting my hands dirty tearing these horns apart and building back up again that I can give you my opinion regarding the general state of the musical instrument manufacturing business: It ain’t what it used to be…mostly.
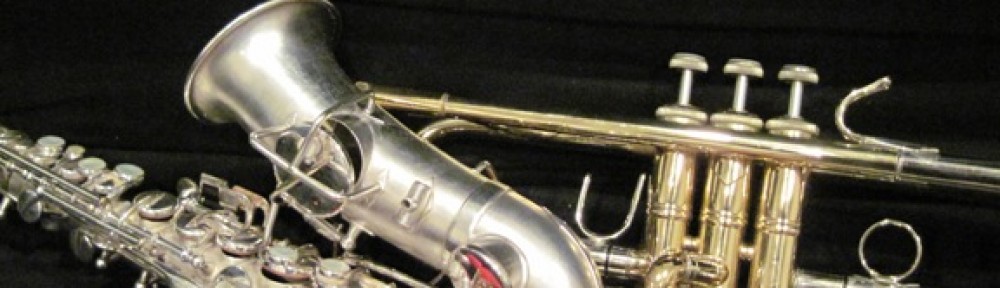
The good ol’ days!

A hundred years ago, there were no student level or pro instruments. All the instruments  were generally offered in one standard. There were different models available; a trumpet suited for jazz vs a trumpet for orchestra work; but all the instruments were suitable for a professional player. No one would know what you meant if you said you wanted a ‘student level trumpet’ back then. Different manufactures were known for certain instruments and models and they were all constantly trying to out-do one another with the latest advances in instrument design. It’s one of the reasons you’ll find such huge number of models of vintage instruments. It worked somewhat as the consumer electronics industry works today with iPhones and Samsung Galaxies, this tablet pc and that HDTV. And this sort of competition drove advances in instrument manufacture and design.

The original student  level instruments:

At some point the instrument companies decided to split their production into student and pro level instruments. The idea was that the student instrument would be more affordable than a pro instrument, more durable as far as accidental damage, and easier to play for a beginner. Take for example, the original Bundy line of instruments from Selmer. These horns were tanks: You could drop them, never clean them, forget to oil the valves and keys and they’d keep playing. The construction was solid and well designed. You can find them today relatively inexpensively and have them overhauled or cleaned and they’ll play for another 50 years. Student instruments opened new markets for the manufacturers and and new opportunities for the masses to get involved in music.

Corporate management and the ‘intermediate’ level horn:

With the successes of the student level horns, companies now had an entirely new market and a new system in place to mass produce instruments. Eventually, someone came up with the idea of the ‘intermediate level’ instrument. From a business standpoint it was a clever move. Lots of other consumer products had entry, mid, and upper level products being sold, so why not musical instruments?

The intermediate level horns being offered then and today (for the most part, yamaha saxohpones being an exception to the rule) aren’t really much different than the student horns apart from some cosmetic upgrades and a few changes in materials here and there. Some would disagree with me, but in my experience, you’re paying for silver plating and some mildly interesting engraving on intermediate horns and that’s about it. Intermediate horns, in my mind, are best left alone. They may look somewhat like a pro instrument, but when it comes to actually playing them, they’re really not any better than a student instrument and in some cases are actually worse. I see them like I see those Hummer H2 SUVs that were popular in the mid 2000s: They may look similar to an actual hummer, but try to drive them the same way and you’re going to get yourself into some serious trouble. But hey, they sold! And that’s why they’re there.

The big problem(s)

So intermediate horns sold well. But the companies still wanted to make more money. But how? Shorten production time. Musical instrument are still made mostly by hand, automation simply hasn’t been completely developed nor integrated into instrument manufacture and for some work, like padding a woodwind instrument, it probably won’t be any time soon. So you could hire more workers or you could increase the load on each worker. It’s much cheaper to simply increase work load and since there’s still only 8 hours in a workday, now a trumpet bell maker in an instrument factory might have a quota of 20 bells a day vs the 15 he had ten years ago. All of that means less time spent on each part which inevitably leads to lower quality.

Another example of the cost of the speed up can be seen if you look at clarinet manufacture: They’re made of African Blackwood and the wood should really sit for a few years and dry out before it’s machined to ensure the piece won’t crack. But while in the past the wood might sit for 3 years before it was made into a clarinet body, negating most instruments from developing cracks, today it might only sit for a year. The result is a whole bunch of unstable clarinets cracking.Finally, and this is something that really bugs me, there’s a growing problem with the finishing of brass instruments; specifically the buffing and degreasing process but I’m going to write about that in a later post.

A conclusion (sort of) to my disjointed rant

SO! What we have today is a multifaceted issue but the driving force that’s causing most of the problems is modern business management techniques: More work + less time x marketing spin = more profit. In some fields that might work fine, retail for example, but in manufacturing, it isn’t conducive to a quality product. If I was wrong, why do serious musicians often seek out vintage instruments and hold them up as examples of quality not seen in modern productions? Heck, look at Selmer; they have the Reference series of saxophones that are supposedly a sort of copy of their famed Mark VI line. They’re basically admitting they can’t make their own horns the way they used to! The Bach part of Selmer is doing the same thing with their Artisan series trumpets. There’s even some company that bought the old Bundy name and is slapping it on junky Chinese instruments and you know what their slogan is? Bundy: The return of a legend! I don’t know who thinks the Bundy name is legendary, but anyway, it proves my point, the instrument manufacturers are seriously lost.

Fitting a flute headjoint when normal methods won’t work.

headjoint

So I had a flute come in with a loose headjoint. Normally, I would be able to get a mandrel or expander and get in the headjoint and expanded it to fit snugly into the receiver. The problem with this headjoint was that the end fit snugly but once you had it all the way into the receiver, it started to wobble. I could take an expander and bulge the metal outwards farther up the tube towards the lip-plate and that would probably make the joint fit, but I can’t do that because that would destroy the tapper of the tube which is a no-no and would cause acoustic problems. A better option is to add material to the outside of the headjoint to make it fit securely which is what I did. Using paper thin brass sheet, I measured and cut a strip that I then attached to the tube with contact cement. Next I used micro mesh to sand down the brass until it fit properly into the receiver. Finally, I trimmed and removed the excess sheeting with a razor blade so when the headjoint is fully inserted into the flute, you can’t see the brass strip. If I ever want to undo this repair, all I have to do is apply heat and the glue will release. If I really wanted to be extra fancy, I could have even silver plated the brass strip but the acid in the plating solution may have released the glue and rendered the whole effort pointless so I let it be this time. Maybe I’ll experiment on one of my own flutes later just to see if the glue will hold.

//

It’s been a while

I haven’t written anything for the last couple of months; things have been really busy in the shop and at home. It’s rental season after all and in addition to that, all the teachers want their horns back ASAP. So I’ve been working a lot of overtime lately.

Update on that conn bass sax: I failed in designing a new octave system. That bummed me out but I ran out of time so I had to just copy the original mechanism. Horn ended up playing really nicely and looking good, but I really wanted to finish my design. Oh well, maybe next time. Frankly I hope it isn’t too soon, I’m not in the mood to overhaul another bass sax for a long while.

I lucked out not long ago and I found a guy selling his old r13 for $25 on craigslist. I overhauled it and now I’m trying to sell it for a decent price. It’s a nice horn for sure. A King Zephyr tenor sax I had sitting around for a while was also just completed. I’m trying to sell that horn too.

I’ll write some sort of repair related post soon.